

You installed new insulation, upgraded your thermostat, and maybe even added a smart home system, yet your energy bills keep climbing and rooms still feel drafty. This is a common frustration for homeowners who assume that one or two visible upgrades will fix a whole-house heat loss problem. The truth is that heat escapes through dozens of small gaps and outdated systems working together, not just one weak link. Understanding where the hidden losses are coming from is the first step toward a home that actually stays warm.
Windows That Look New But Still Leak Air
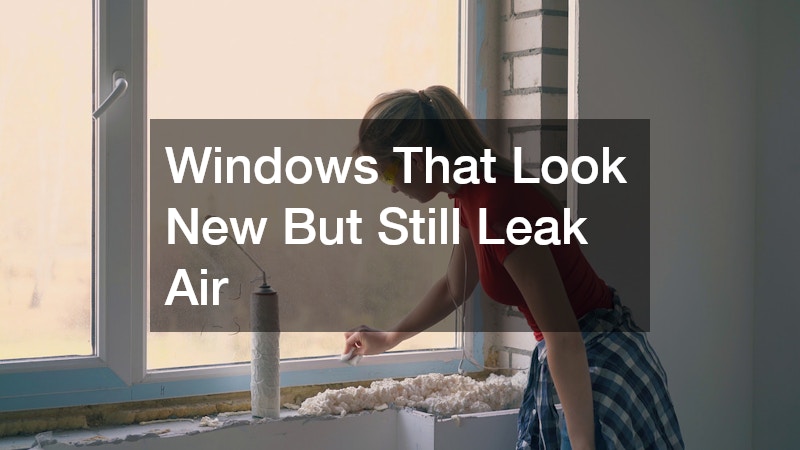
Many homeowners assume that as long as windows are double-paned, they are doing their job, but the frame style matters just as much as the glass. Older sliding or double-hung windows often develop gaps around the sash over time, letting conditioned air slip out even if the glass itself is in good shape. The moving parts in these styles rely on weatherstripping and gravity to hold the seal, and once that weatherstripping compresses or cracks after a few years of use, the window can leak air even while looking perfectly fine from the outside. Upgrading to casement windows can make a noticeable difference because they close with a compression seal, pressing the sash firmly against the frame when latched. This design typically resists air infiltration better than styles that rely on friction alone to stay shut. Because the sash swings outward and locks at multiple points along the frame, wind actually presses the window tighter rather than working it loose over time. If a full window replacement isn’t in the budget right away, it’s worth having a contractor check the condition of the weatherstripping and hardware on existing sliding or double-hung units first. In some cases, simply replacing worn seals or adjusting the locking mechanism can restore a snug fit for a fraction of the cost. But for homes with windows older than 15 to 20 years, the frames themselves have often warped or shrunk enough that no amount of seal replacement will fully solve the draft problem, making casement windows a more permanent fix.
Even windows that appear brand new can be quietly leaking conditioned air if installation was rushed or the surrounding frame was never properly sealed. If you have replaced only some windows in your home, the untouched originals may be undermining your efforts elsewhere, sometimes losing more heat than an older, single-pane window that was installed with care. A room-by-room comparison using a simple hand test on a windy day can reveal which windows are still letting drafts through. Hold your hand an inch or two from the edges of the frame and sash, and pay close attention to corners and the meeting rail where the upper and lower sashes overlap. A lit candle or incense stick works even better, since visible smoke movement can catch drafts too faint to feel by hand. Don’t stop at the glass itself. Cracked or missing caulk along the exterior frame, gaps in the interior trim, and worn weatherstripping are all common culprits, even on windows less than five years old. It’s also worth checking whether the low-E coating and gas fill (if the window is double- or triple-pane) are still intact, since a failed seal will show up as fogging or condensation between the panes. If you find one or two problem windows, resealing or replacing the weatherstripping is often enough. But if drafts show up across multiple rooms, it may point to a larger issue, like poor installation flashing, that’s worth having a contractor inspect before you spend more money on upgrades elsewhere.
Roof Ventilation and Attic Insulation Gaps

A surprising amount of heat loss happens through the attic, even in homes with newer shingles. If your attic insulation was disturbed during a previous roof replacement, or if it was never brought up to current recommended depth, warm air can escape straight through the ceiling. Most building codes now call for R-38 to R-60 of insulation in attic spaces, but many homes are still sitting at R-19 or R-30 levels installed decades ago. Ventilation problems compound the issue in ways homeowners rarely expect. Blocked soffit vents, crushed baffles, or insulation piled directly against the roof deck can trap moisture and reduce the attic’s ability to regulate temperature, which forces your HVAC system to work harder in both winter and summer. A poorly balanced system—too much intake air and not enough exhaust, or vice versa—can also create ice dams along the roofline that make heat loss worse. Working with reputable roofing companies during your next inspection can help you confirm whether your attic ventilation and insulation are actually working together instead of against each other. Ask specifically about baffle placement, current insulation depth measured in inches rather than just “looks sufficient,” and whether soffit-to-ridge airflow is unobstructed. A thermal camera scan, which many contractors now offer, can pinpoint exactly where warm air is escaping before you spend money on a full re-insulation job.
Poor ventilation can also trap moisture, which compresses insulation fibers and reduces their effectiveness over time. When warm, humid air from your living space rises into the attic and has nowhere to escape, it condenses on the underside of the roof deck and settles into insulation, particularly fiberglass batts and loose-fill cellulose. Once compressed or damp, insulation loses much of its R-value, sometimes dropping performance by 30-50%, even though it still looks intact from below. Signs of this include ice dams in winter or unusually high attic temperatures in summer. Ice dams form when heat escaping from the attic melts snow on the upper roof, which then refreezes at the colder eaves, creating a ridge that traps water and can force it under shingles. In summer, a poorly ventilated attic can reach 130-150°F, well above the 100-110°F range of a properly vented one, which drives up cooling costs and stresses roofing materials. Other clues worth checking include musty odors, visible mold or dark staining on rafters, and rusted nail tips protruding through the roof sheathing. If you notice any of these, it’s worth inspecting whether your soffit and ridge vents are actually clear, since insulation or debris blocking them is a common and easily fixable culprit.
- Check for daylight visible through the attic boards near the roofline, especially around chimneys and vent pipes
- Look for compressed or matted insulation, which loses R-value — even 2 inches of compression can cut effectiveness nearly in half
- Look for dark, dirty streaks in the insulation, a sign air is leaking through and carrying dust with it
- Ask about baffles that keep soffit vents from being blocked by insulation, since blocked vents stall the airflow the system depends on
- Confirm insulation depth meets current recommendations for your climate zone — most northern regions need R-49 to R-60, roughly 14-17 inches of blown-in fiberglass
- Watch for ice dams or frost patterns on the roof in winter, which often point to heat escaping unevenly through the attic
- Verify that ridge and soffit vents are balanced, since too much of one without the other disrupts proper attic airflow
Heating Systems That Are Too Old or Too Small

Sometimes the problem is not the building envelope at all, it is the equipment trying to heat it. A furnace or boiler that was sized for your home decades ago may no longer match your current insulation levels, window upgrades, or square footage if you have added on. Bringing in heating and air conditioning contractors for a load calculation can reveal whether your system is undersized, oversized, or simply aging out of peak efficiency. An improperly sized system often runs longer cycles trying to compensate, which can feel like constant heat loss even when the equipment is technically working.
Homeowners frequently overlook that a furnace losing efficiency does not always announce itself with strange noises or visible damage. It can just quietly cost more to run while providing less comfort throughout the house.
Zoned Comfort Through Ductless Heating Options
Traditional forced-air systems rely on ductwork that can lose a significant percentage of heated air before it even reaches the room, especially in older homes with ducts running through unconditioned spaces like attics or crawlspaces. This is one reason ductless mini split heat pump installation has become popular for additions, converted garages, or homes where extending existing ductwork is impractical. Because these systems deliver heat directly into a room without traveling through duct runs, they sidestep a major source of loss altogether.
They also allow for zoned control, meaning you can keep frequently used rooms warm without overheating unused spaces. This flexibility can be especially useful in homes with inconsistent heat distribution between floors or additions built at different times.
Bathroom Renovations and Overlooked Air Gaps
Bathroom remodels are popular for aesthetic and resale reasons, but they can also be an opportunity to address hidden drafts. When homeowners convert a tub to shower, the surrounding plumbing and wall cavities are opened up, which is the ideal moment to check for missing insulation or air sealing around pipes. Exterior-facing bathroom walls are notorious for thin or missing insulation because of the plumbing runs that pass through them.
If your bathroom always feels colder than the rest of the house, it is worth asking your contractor to inspect the wall cavity before closing it back up. Small gaps around drain lines and supply pipes are easy to seal during a renovation but difficult to reach afterward.
Flooring Choices and Their Effect on Room Temperature

Flooring might not be the first thing that comes to mind with heat loss, but material choice affects how a room retains warmth underfoot and overall. Tile is a popular choice for bathrooms and kitchens because it is durable and easy to clean, but its density means it conducts heat away from bodies and rooms faster than carpet or engineered wood. Without a radiant heating layer underneath, tile floors can make a room feel colder than the thermostat reading suggests, leading homeowners to crank up the heat unnecessarily. The temperature gap isn’t just a feeling — it’s measurable. A tile floor in an unheated bathroom can sit 5 to 10 degrees cooler to the touch than the surrounding air temperature, especially over slab foundations or above unconditioned crawl spaces. That constant thermal drain pulls warmth from the room and from bare feet, which is why bathrooms with tile often feel drafty even when insulation and windows are up to date. Carpet, by contrast, traps air within its fibers, acting as a natural insulator that slows heat transfer. Engineered wood and laminate fall somewhere in between, offering better warmth retention than tile but less than carpet or a plush underlayment. The subfloor matters too: tile installed directly over concrete loses heat far faster than tile set over a wood subfloor with proper insulation beneath it. Homeowners who love the look of tile don’t have to sacrifice comfort. Electric radiant floor heating mats or hydronic systems installed beneath the tile can offset the material’s natural heat loss, keeping surface temperatures consistent without raising the whole-house thermostat. Area rugs, foam mats, or even a simple insulating underlayment during installation can also reduce the chill without a full renovation.
This does not mean tile should be avoided, but it does mean pairing it with proper subfloor insulation or an in-floor heating element is worth considering during a renovation. Tile conducts heat away from bare feet quickly, which is why bathrooms and kitchens with tile floors often feel colder than carpeted rooms even when the thermostat reads the same temperature. A well-installed system underneath can offset the natural coolness of the material. Options range from rigid foam board insulation placed beneath the subfloor to electric radiant heating mats installed directly under the tile, with the latter typically raising floor surface temperature by 10 to 15 degrees during operation. Cost is a real factor here. Basic foam underlayment adds a modest expense to a renovation budget, while a full radiant heat system can run several dollars per square foot installed, though many homeowners recoup some of that through lower space-heater use and improved comfort. It’s also worth checking whether existing tile floors have any insulation barrier at all. Older homes frequently have tile laid directly over a wood subfloor with no thermal break, meaning cold air from a crawlspace or basement travels straight up through the material and into the room above.
Outdoor Landscaping Decisions That Affect Indoor Comfort
What happens outside your home has more influence on indoor temperature than most homeowners realize. Overgrown brush, dense tree lines, and unmanaged vegetation close to the foundation can trap moisture against the exterior walls, which gradually degrades siding and insulation performance. Property owners looking to open up their land and improve drainage around the home often turn to forestry mulching as a way to clear overgrown areas without the disruption of full excavation.
Clearing this vegetation also allows more sunlight to reach exterior walls during winter months, which can provide a small but real passive heating boost. Additionally, well-maintained grading around the foundation reduces the chance of water pooling against the house, which can undermine insulation in basement walls over time.
Grading, Drainage, and Foundation Moisture Control
Water intrusion around the foundation is one of the most overlooked contributors to indoor heat loss because it works slowly and invisibly. When soil around your home slopes toward the foundation instead of away from it, moisture seeps into basement walls and compromises insulation from the inside out. Excavation contractors can regrade the soil, install proper drainage channels, and correct slope issues that have built up over years of settling.
A damp basement is not just an air quality concern, it is also a heat loss issue because wet insulation loses much of its effectiveness. Homeowners who fix visible symptoms like cracked walls but ignore the underlying drainage problem often find the moisture issue, and the associated heat loss, returns within a year or two.
Fencing, Wind Exposure, and Microclimates Around the House
The way wind moves across your property can meaningfully affect how much heat your home loses through its exterior walls, particularly on the side facing prevailing winter winds. Homeowners in exposed or rural settings sometimes work with fence companies to install windbreaks that reduce the chill factor hitting exterior walls and windows. A solid or semi-solid fence positioned on the windward side can reduce wind speed near the home, which in turn reduces the rate of convective heat loss from exterior surfaces.
This is a subtle factor compared to insulation or window upgrades, but it matters more in older homes with less efficient wall assemblies. Combining wind mitigation with other upgrades tends to produce a noticeably more consistent indoor temperature during the coldest months.
Outdoor Living Spaces and Their Hidden Impact on Energy Use
Patios, walkways, and outdoor living areas do not directly cause indoor heat loss, but the excavation and grading work involved in creating them can affect drainage patterns near the foundation if not done carefully. When planning a new patio, paver installation should account for proper slope away from the house so runoff does not collect near basement walls or crawlspace vents. Poor drainage planning during hardscape projects is a common way homeowners unintentionally introduce moisture problems years after the project is finished.
If you are planning an outdoor renovation, it is worth asking your contractor how the project will handle water runoff relative to your home’s foundation. A well-planned layout protects both your landscaping investment and your home’s thermal performance.
Heat loss is rarely caused by a single failure, it is usually the sum of several small gaps across windows, roofing, mechanical systems, and even the land around your home. Rather than assuming your last upgrade should have solved the problem, take a systematic look at each of these areas to find where warmth is actually escaping. A room-by-room and system-by-system review, ideally with the help of qualified professionals in each trade, will give you a clearer picture than guesswork ever could. Once you identify the real sources of loss, you can prioritize fixes that deliver lasting comfort instead of chasing symptoms one upgrade at a time.
