

Owning an older or historic home offers a connection to architectural craftsmanship that is nearly impossible to replicate in modern construction. From hand-carved wood trim and thick plaster walls to custom masonry hearths and unique rooflines, these properties possess a distinct personality and soul. However, living in an aging house often comes with functional trade-offs: drafty rooms, outdated plumbing, insufficient electrical capacity, and floor plans that do not quite suit 21st-century lifestyles.
The primary challenge for any historic home renovation is striking a balance between preservation and renewal. Upgrading a property for modern comfort should never mean stripping away its original character. By focusing on low-impact, high-efficiency updates, you can improve safety, energy performance, and daily convenience while safeguarding the architectural integrity that makes your home special. This comprehensive guide walks you through the essential phases of updating an older house without destroying its historic roots.
Phase 1: Structural Integrity and Foundation Assessment

Before embarking on cosmetic updates or opening up wall cavities, you must ensure the structural core of your house is stable, dry, and secure. Older properties have often survived decades or even centuries of environmental stress, soil settlement, and changing weather conditions. Evaluating and stabilizing the structural skeleton prevents costly damage down the road when heavier modern finishes or appliances are introduced.
Assessing Load-Bearing Systems and Masonry Health
Settling is natural in older structures, but structural movement must be differentiated from benign cosmetic cracking. Inspecting foundation walls, floor joists, and main support beams is the first critical step in any restoration project.
- Inspect sill plates and joists: Check where the timber structure meets the foundation masonry for signs of rot, sag, or moisture intrusion.
- Examine brick and stone mortar: Look for soft, crumbling mortar joints in historic foundations, which often require traditional lime-based repointing rather than harsh modern Portland cement.
- Evaluate floor levelness: Minor dips add character, but significant slants may indicate decaying posts, shifting footings, or compromised load-bearing walls.
Safeguarding Timber and Foundations from Subterranean Pests
The organic timber used in older home construction—often dense, old-growth wood—is a primary target for wood-destroying insects if moisture levels rise. Unchecked infestations can hollow out structural posts, subfloors, and framing hidden behind lathe and plaster walls.
Before starting any structural repairs or wall sealing, schedule a thorough evaluation with a professional pest control service. Treating sill plates, basement header joists, and crawlspaces creates a protective barrier that preserves the historic framing for generations to come. Continuous monitoring prevents hidden subterranean termite or beetle infestations from undermining costly interior restorations.
Reinforcing Internal Framing for Open-Concept Living
Many homeowners want to open up small, compartmentalized historic rooms to create better flow for modern living. However, removing walls in older homes requires extreme care, as interior partitions often carry surprising amounts of weight from floors above.
- Load redistribution: Replacing heavy structural walls with hidden steel I-beams or glue-laminated timber allows for open spaces while maintaining the support network.
- Plaster preservation: Carefully shore up surrounding ceiling lathe and plaster before removing wall sections to prevent cracking adjacent original surfaces.
- Specialized execution: Partnering with an experienced structure building contractor ensures that structural modifications meet contemporary load codes without causing settlement in original upper-level rooms.
Phase 2: Preserving Thermal Envelope and Hearth Features
The hearth was historically the heart of the home, serving as both the main heat source and a central gathering spot. Preserving original fireplaces while upgrading the building’s thermal envelope ensures your house remains warm, efficient, and safe without sacrificing its antique aesthetic.
Maintaining Period Fireplaces Safely
Original brick, fieldstone, or marble fireplaces are defining architectural features in vintage homes. However, decades of wood burning, shifting chimneys, and obsolete venting can turn a classic hearth into a fire hazard or major source of heat loss.
Restoring an antique hearth requires balancing traditional aesthetics with contemporary fire safety standards. Engaging a dedicated fireplace service allows you to inspect clay flues, repair damaged firebrick, and install hidden damper systems. Inserting modern, zero-clearance gas or wood inserts into original fireboxes can dramatically improve heating efficiency without altering the decorative surround, mantel, or tilework.
Masonry and Flue Restoration
Exterior chimneys endure constant exposure to freeze-thaw cycles, wind, and rain. Over time, moisture penetration can cause bricks to spall, mortar to wash away, and the internal chimney liner to crack, presenting serious risks to the home.
- Crown and cap repairs: Install custom concrete crowns and stainless steel caps to keep rain, debris, and animals out of the chimney flue.
- Tuckpointing masonry: Replace damaged exterior mortar using soft, breathable mortar mixes that match the original color and composition.
- Flue lining upgrades: Hire an established chimney repair company to install code-compliant stainless steel or poured-in-place liner systems, ensuring toxic gases and combustion heat are safely vented away from historic timber framing.
Insulation Strategies for Historic Walls
Insulating an older home requires a nuanced approach because traditional wall assemblies were designed to “breathe.” Trapping moisture inside wall cavities can lead to hidden rot and peeling exterior paint.
- Attic floor insulation: Prioritize insulating the attic space first, as this yields the highest energy savings without altering interior or exterior wall structures.
- Blown-in cellulose: Use breathable insulation materials inserted through small exterior or interior access holes to fill hollow wall bays gently.
- Air sealing before insulating: Seal leaks around light fixtures, access hatches, and rim joists before adding insulation to maximize thermal performance.
Phase 3: High-Efficiency Plumbing and Water Systems

Outdated plumbing is one of the most common friction points in historic homes. Galvanized iron pipes rust from the inside out, leading to poor water pressure, discolored water, and eventual leaks. Upgrading water distribution and heating systems brings modern luxury while eliminating hidden water damage risks.
Transitioning from Galvanized Pipes to Modern Materials
Replacing old supply lines with modern flexible PEX or durable copper tubing dramatically improves water flow and purity. Because PEX can be snaked through existing wall cavities, plumbers can update entire supply networks with minimal damage to historic plaster walls and decorative baseboards.
Space-Saving Hot Water Solutions
Traditional water heaters require large, bulky storage tanks that take up valuable floor space in basements, mechanical closets, or utility rooms. In older homes where basement square footage is precious or ceiling heights are low, big tanks create unwanted layout constraints.
Upgrading your hot water setup to modern on-demand systems solves both capacity and space challenges. Working with certified tankless water heater installers allows you to remove large storage vessels, freeing up room for laundry or storage while providing continuous hot water on demand. Tankless systems also consume significantly less energy by heating water only when taps are open, aligning with modern efficiency goals.
Managing On-Site Water Infrastructure for Rural Properties
Historic farmhouses, country estates, and rural properties often rely on independent water infrastructure rather than municipal supplies. Original shallow wells or aging pump systems may fail to meet the flow rates required by modern bathrooms and appliances.
- Well depth and yield testing: Evaluate original water sources to ensure adequate recovery rates during peak usage hours.
- Filtration and softening: Install modern multi-stage filtration systems to remove iron, hard minerals, and sediment common in older private wells.
- Pumping equipment updates: Consult with qualified water well companies to replace outdated jet pumps with high-efficiency submersible pumps, ensuring reliable, high-pressure water delivery across the entire property.
Phase 4: Invisible Security and Specialty Material Testing
Protecting an older home from security threats and environmental degradation requires modern technology, but visible gadgets, security bars, or harsh chemicals can destroy delicate historic finishes. Modern updates should remain as visually subtle as possible.
Low-Profile Window and Door Protection
Original glass panes—often displaying wavy, hand-blown characteristics—are essential to an older home’s historical identity. Replacing historic wood windows with vinyl units frequently ruins the facade’s proportions and character. However, single-pane historic glass offers minimal security and impact resistance.
Custom protective window screens offer a discreet solution for securing vulnerable ground-floor windows and entry doors. By opting for a low-profile security window screen, you add a high-tensile stainless steel barrier against intruders and flying debris without adding bulky visual bars or replacing original timber frames. These screens integrate neatly into existing window trim, maintaining historical curb appeal while delivering modern protection.
Scientific Surface and Coating Diagnostics
Restoring older wood, metal, plaster, or masonry often involves applying high-performance modern coatings, sealants, vapor barriers, or adhesive films over historic substrate materials. If the surface energy of the historical material is incompatible with the new coating, paint peeling, bubbling, or sealant failure will occur rapidly.
Executing a scientific assessment using a specialized dyne test service allows restorers to measure the precise surface energy and wettability of historic building materials. Understanding surface tension ensures that specialty primer coats, water repellents, or protective glass laminates bond permanently without damaging underlying antique substrates.
Modern Home Automation and Invisible Technology
Integrating modern electronics into a vintage structure requires creative routing and clever concealment. Modern conveniences can be integrated without visually cluttering historically styled rooms.
- Concealed wiring paths: Route modern low-voltage wiring behind original baseboards, inside hollow crown molding, or through existing floor joist spaces.
- Discreet sensor placement: Choose smart home sensors, thermostats, and smoke detectors with compact profiles or retro finishes that blend seamlessly into plaster walls.
- Centralized media hubs: Locate home audio equipment, internet routers, and security hubs in out-of-the-way basements or utility closets, running signal lines invisibly to living areas.
Phase 5: Outdoor Living and Landscape Integration

The land surrounding a historic property plays a huge role in its overall character. Designing outdoor amenities, boundary structures, and garden spaces requires thoughtful planning to ensure modern additions feel like natural extensions of the historical architecture.
Blending Historic Architecture with Outdoor Amenities
Adding modern outdoor recreational features like dining terraces, outdoor kitchens, or in-ground swimming pools requires careful placement. Modern hardscaping should respect original site geometry, historic garden layouts, and architectural sightlines.
- Material harmony: Choose natural stone pavers, clay brick, or dark finishes that complement the main house rather than bright, synthetic-looking tiles.
- Proportional setbacks: Position large installations far enough from the main residence so they do not dominate primary views of the historic facade.
- Softscape screening: Use heritage plantings, formal boxwood hedges, or stone retaining walls to visually soften modern recreational installations.
Durable Property Boundaries and Fencing
Establishing clear property boundaries, enclosing yards for children or pets, and protecting garden areas are essential tasks for any homeowner. However, modern fencing styles can easily clash with historical home styles if not implemented thoughtfully.
- Subtle perimeter solutions: When full-view traditional wrought iron or heavy timber fencing is cost-prohibitive across large boundaries, opt for a clean chain link fence installation along rear property lines or wooded borders.
- Vegetative blending: Plant climbing ivy, evergreen hedges, or dense shrubs alongside simple metal fencing to create a living green wall that hides metal mesh entirely.
- Architectural accents: Combine utilitarian perimeter fencing with decorative historic gates or stone pillars at main driveway entrances to maintain period-appropriate curb appeal.
Phase 6: Interior Finishes, Layouts, and Millwork Preservation
The interior details of a classic home—casing, baseboards, picture rails, original hardwood flooring, and plaster moldings—are what give the interior spaces warmth and distinction. Protecting these elements while making spatial adjustments requires patience and precision.
Preserving and Restoring Period Millwork
Original interior woodwork was often milled from high-grade lumber with dense grain patterns rarely found in home improvement stores today. Preserving these details is far better than replacing them with modern fiberboard composite imitations.
- Chemical stripping vs. replacement: Carefully strip layers of old paint using gentle heat guns or eco-friendly chemical strippers rather than aggressive sanding that destroys fine wood profiles.
- Custom matching: If sections of original trim are missing or beyond repair, take a cross-section profile to a local millwork shop to have custom matching pieces turned.
- Refinishing original floors: Sand antique tongue-and-groove hardwood floors conservatively, using high-durability matte sealants that highlight natural grain variation without creating a plasticky shine.
Restoring a Modern Home With This Guide
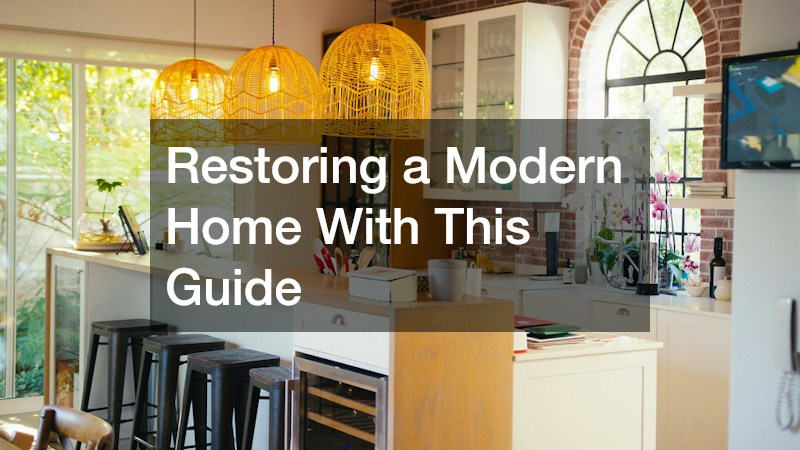
Renovating an older house is a journey of stewardship. By viewing your property not as an outdated building that needs complete overhaul, but as a historic structure worthy of careful adaptation, you create a living space that offers the best of both worlds. Modern plumbing, reliable security, efficient heating, and functional living layouts can coexist harmoniously with hand-carved millwork, original masonry hearths, and classic architectural lines.
